Saturday, October 12, 2019
Atlas Biomechanics : How to Make Your Own Custom Arch Support Orthotic
Atlas Biomechanics : How to Make Your Own Custom Arch Support Orthotic: When your physician, podiatrist, chiropractor or physical therapist thinks it’s time to start using arch support orthotics, finding the r...

How to Make Your Own Custom Arch Support Orthotic
When your physician, podiatrist, chiropractor or physical therapist thinks it’s time to start using arch support orthotics, finding the right fit is of paramount importance. You may think that getting fitted for custom foot orthotics is a complicated process requiring time, money and expensive equipment. However, getting the support your feet need is actually easier than you think! When you order thermoplastic heat moldable orthotic arch support insoles, achieving a glove-like fit during an can be done in as little as 10 minutes. Best of all, Atlas Biomechanics crafts orthotic inserts for each type of wear. Our heat molded insoles are available for dress shoes and athletic footwear, as well as in prefabricated models.

Heating the Orthotic Blank
There are 3 Ways to Heat the Blank
1) Purchase a heat gun (not a hair dryer) and heat resistant gloves at any hardware store.
Place the blank on a surface that will not burn from heat.
Hold the heat gun 1cm (1/2 inch) away from the blank.
Slowly move the heat gun up and down the blank.
Do not stop moving the heat gun ( you will melt the orthotic).
The average time is about 1.5-2 minutes.
Wearing heat resistant gloves you may push the arch to check for softness.
If it is still stiff, reheat for 10-15 seconds.
2) Boil water and turn off heat.
Wait 1 minute and then place the orthotic blank in the hot water.
Let the orthotic blank sit in the water for 1 minute.
Using a heat resistant gloves place the orthotic under the shoe's insole.
Step into the shoe and press down for 2 minutes to mold the orthotic to your foot
3) Atlas Biomechanics also recommends using a toaster oven at 200 degrees.
Heat Moldable Orthotics come in athletic or dress profile
Molding the Orthotic Blank to the Foot
You can mold the blank either as Subtalar Neutral or Calcaneal Resting Position, or a combo of each.
You can mold the blank while sitting, standing in a shoe (ski boot, ice skate, golf shoe or ballet flats) or on
a pillow.
Do not mold directly to the foot. Use a heat protector such as a towel, double socks or the shoe's insole.
Make sure the rear of the orthotic is not too far forward on the foot.
Make sure the medial side of the orthotic covers the arch entirely.
Either hold the foot in Subtalar Joint Neutral or Calcaneal Resting Position and have the patient press firmly down.
If molding directly in a gym shoe, use the insole as the heat protector. Place the orthotic under the insole and have the patient press down.
After the patient has molded the orthotic, place it in their shoes. It is most comfortable under the insole.
Break in Period
As with any new device in their shoe, there is a break in period.
If using the orthotic in gym shoes, place it under the insole.
If wearing it in dress shoes, use a little double sided tape to hold in place.
Have the patient wear the orthotic only 2 hours the first day.
Every additional day increase the time by 2 hours.
It uncomfortable, have them remove the orthotic, wait 2 hours and resume the break in period.
Atlas Biomechanics reccomends the patient return in two weeks for a follow-up and fine tuning of the orthotic.
Molding Tips
To avoid any problems, you want the patient to be happy with the fit before they leave the office.
Make sure the orthotic is feeling fine to the patient and fits well.
Remember this orthotic can be modified endless ways with the heat gun.
Sometimes the patient will feel that the arch is either too high or low, modify it to their comfort level.
You may see waves in the orthotic. This is the bony prominences of the foot that have been captured in the orthotic and is an accurate mold that should be comfortable on the foot.
Treat; Plantar Fasciitis, Heel Spur, Achilles Tendonitis, Arch Pain, Posterior Tibialis Dysfunction, Foot Fatigue, Knee Pain, Low Back Pain
Teri Green
Atlas Biomechanics
Atlas Biomechanics : How to use Ring Shaped Circle Corn Stick On Foot P...
Atlas Biomechanics : How to use Ring Shaped Circle Corn Stick On Foot P...: Ring shaped circle corn toe pads are 3/4" wide rings. They are 1/8" thick with adhesive backing. Medical grade hammertoe stick on ...
How to use Ring Shaped Circle Corn Stick On Foot Pads
Ring shaped circle corn toe pads are 3/4" wide rings. They are 1/8" thick with adhesive backing. Medical grade hammertoe stick on circle foot ring corn cushions are the same medical quality corn cushions as dispensed from Doctor's Offices.
They come as 100 bulk circle ring corn pads per pack and are 3 mm (1/8 inch) thick stick on pads. We manufacturer them as either foam or felt. Toe pads are made to protect hammertoes, corns, and soft corns. They are produced in the USA of medical grade felt or foam. Circle round corn cushions used to treat hammertoes on feet. Decreases friction on the hammertoe knuckles that cause corns on feet.
 How to use Atlas Biomechanics' Circle Round Corn Ring Stick On Foot Pads
+ apply corn pad to a clean and dry foot
+ position corn pad so that the opening is placed around the affected corn
+ remove the corn pad for at least 5 hours per day or night to allow skin the breathe
+ after use each day, remove corn pad gently by slowly peeling it away from the skin
+ do not place corn pad on open skin.
+ if irritation, discomfort or any problems discontinue use and notify your physician
Teri Green
Atlas Biomechanics
They come as 100 bulk circle ring corn pads per pack and are 3 mm (1/8 inch) thick stick on pads. We manufacturer them as either foam or felt. Toe pads are made to protect hammertoes, corns, and soft corns. They are produced in the USA of medical grade felt or foam. Circle round corn cushions used to treat hammertoes on feet. Decreases friction on the hammertoe knuckles that cause corns on feet.
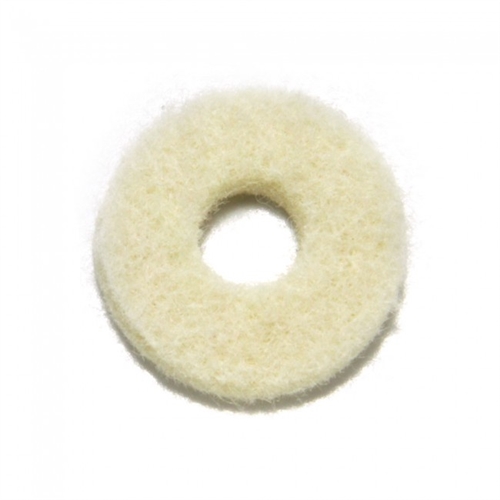
+ apply corn pad to a clean and dry foot
+ position corn pad so that the opening is placed around the affected corn
+ remove the corn pad for at least 5 hours per day or night to allow skin the breathe
+ after use each day, remove corn pad gently by slowly peeling it away from the skin
+ do not place corn pad on open skin.
+ if irritation, discomfort or any problems discontinue use and notify your physician
Teri Green
Atlas Biomechanics
Thursday, September 26, 2019
Atlas Biomechanics : Carbon Stabilizer Plate Insole Treating Hallux Rig...
Atlas Biomechanics : Carbon Stabilizer Plate Insole Treating Hallux Rig...: Hallux Rigidus and Hallux Limitus are painful foot conditions that are hard to treat conservatively. Using a carbon stabilizer plate insole ...
Carbon Stabilizer Plate Rigid Insole Treating Hallux Rigidus / Limitus
Hallux Rigidus and Hallux Limitus are painful foot conditions that are hard to treat conservatively. When using a carbon stabilizer rigid plate, the big toe joint (1st MPJ) has decreased painful range of motion. Using a carbon stabilizer plate insole is often overlooked when treating these conditions. The difference in Hallux Rigidus and Limitus is the degree of limitation.

When the big toe (hallux) dorsiflexs and runs into the first metatarsal head, boney spurring will occur on the top of the big toe joint (first MPJ). The big toe joint (1st MPJ) joint will also narrow and become arthritic. Range of motion of the big toe joint will become painful.
Treating it with a carbon stabilizer plate insole will limit the painful range of motion in these patients. Carbon foot plates are thin, about 2 mm thick which allows easy shoe placement. They are also simple to remove and place in different shoes. The carbon steel stabilizer plate insoles material is rigid to limit forefoot range of motion. A typical carbon rigid plate will last several years. One can either use the carbon foot rigid insole as a stand alone treatment or in conjunction with other conservative treatments.
Teri Green
Atlas Biomechanics
About Atlas Biomechanics: We are a woman owned sports medical manufacturer of Foot Pads, Carbon Steel Stabilizer Plate Insoles, Heel Lifts and Heat Moldable Orthotics.
Monday, September 23, 2019
Atlas Biomechanics : How to Treat Achilles Tendinitis with Heel Lifts
Atlas Biomechanics : How to Treat Achilles Tendinitis with Heel Lifts: Achilles tendinitis is a common foot injury for both athletes and women who wear high heels. The calf muscle (Gastroc-Soleus) blends into a...
Subscribe to:
Posts (Atom)